Exercise 9: Merge branches
In this exercise, we will see how to merge branches back into a single version.
A) Switch to the main branch
Let’s merge the new branch into the “main” branch. This will integrate the commits we made for the two branches onto the “main” branch. Use the “Branches” tab to set the “main” branch as the current branch.
B) Merge branches
Click on the “Branches” tab again. At the very bottom is a button that should say “Choose a branch to merge into main”. Click on that button.
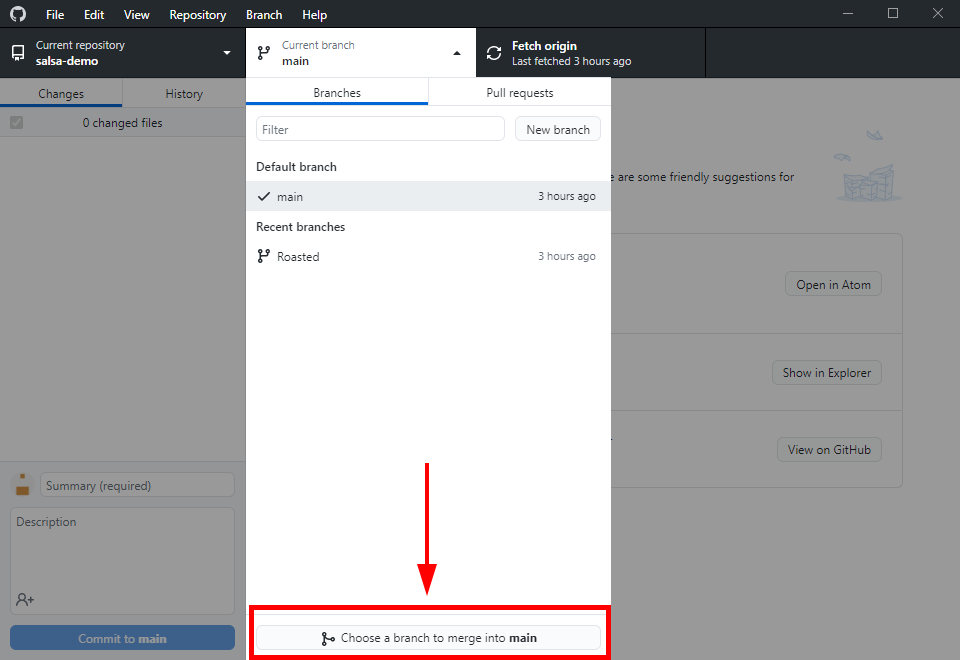
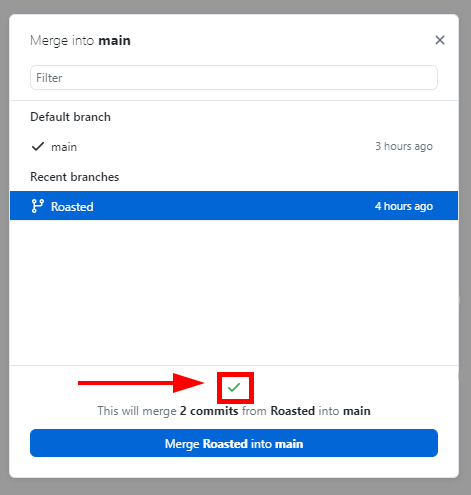
This opens a window that lets you select a branch to merge into the main branch. Select the other branch. Github Desktop will decide if it can automatically merge the two branches. If so, it will display a green check mark. If this is the case, go ahead and click the merge button to merge the two branches.
If Github cannot automatically merge the files, it will display a warning symbol.
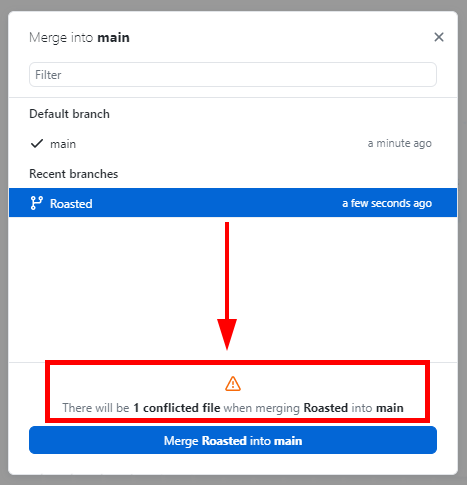
If this is the case, skip ahead to part D.
C) Create a merge conflict
We’re going to now simulate a merge conflict so you can practice resolving it. Switch to the main branch. Edit a line of a file and commit. Now switch to the other branch. Make a different edit to the same line and commit it.
For example, I’ve created a merge conflict in the salsa demo by updating the amount of garlic in the two branches with different amounts.
8 Tomatillos, peeled washed and cut in half
2 Jalapenos, seeds and stems removed
1/4 white onion
3 garlic cloves, peeled
1 bunch fresh cilantro, roughly chopped
1/2 t salt
8 Tomatillos, peeled washed and cut in half
2 Jalapenos, seeds and stems removed
1/4 white onion
4 garlic cloves, peeled
1 bunch fresh cilantro, roughly chopped
1/2 t salt
Once you’ve created a merge conflict, switch to the main branch and attempt to merge the other branch.
D) Resolve a merge conflict
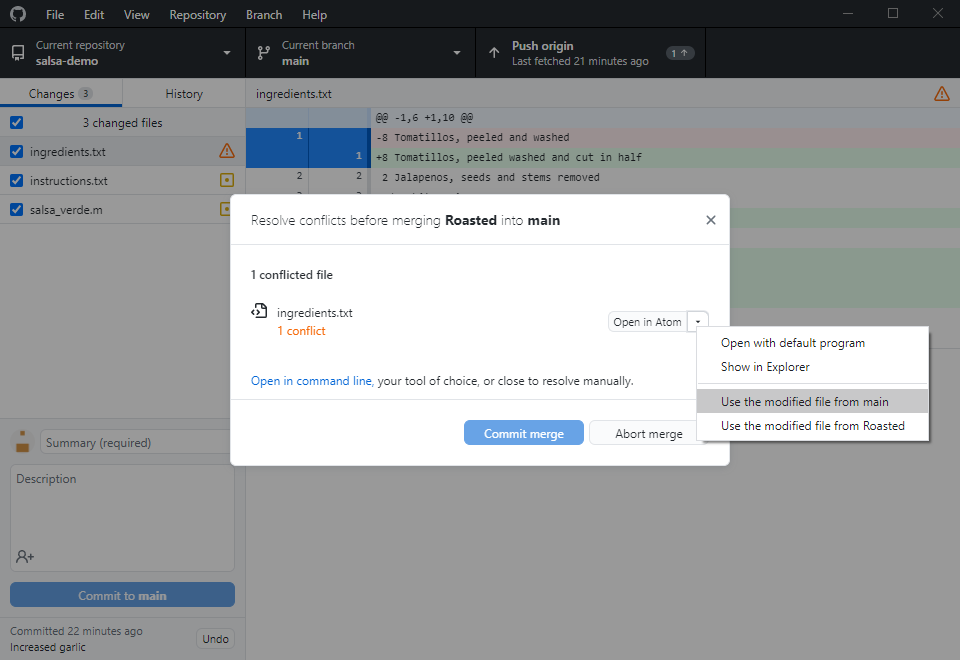
As we saw in part B, if you’ve caused a merge conflict, then Github Desktop will display a warning message above the merge button. Go ahead and click the merge button anyways. This will open a window that lists the conflicted files. For example:
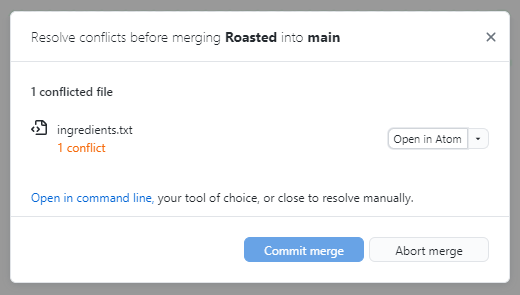
To the right of each conflicted file are two buttons. The first will open the conflicted file in an editor so you can try to correct the conflicting line. If you know that you prefer the version on one branch, you can click the second button (a down arrow) to select the desired branch directly. For example, I could select the main branch as the correct branch:
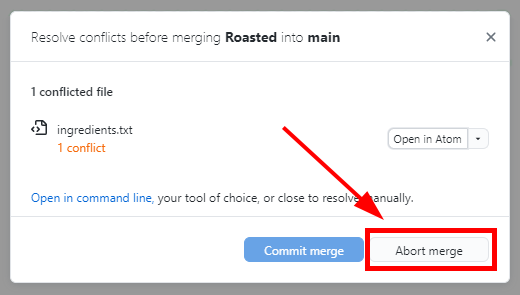
Once the merge conflict is resolved, you will be able to use the “Commit Merge” button to merge the branches. Alternatively, if you want to resolve the conflict some other way, or just want to work on the conflict later, you can cancel the merge by clicking the “Abort Merge” button.
If you do decide to resolve the conflict manually, one way to fix the problem is to copy the desired file contents from one branch to the other.